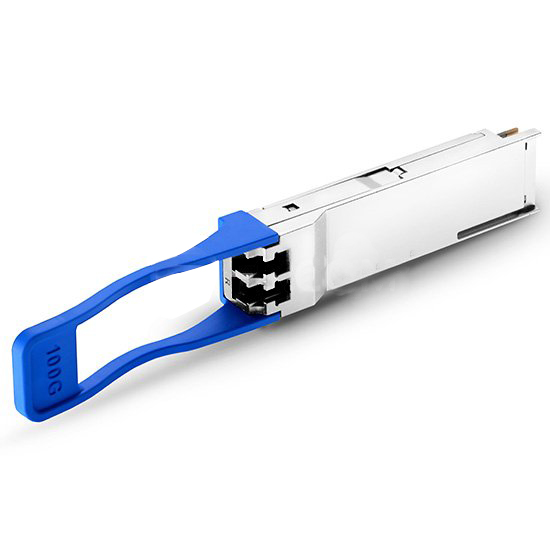
Thanks for choose TARLUZ SFP Transceivers, The transceivers may compatible with different network devices from different venders, TARLUZ could offer Generic and compatible SFP Transceivers,
CAUTION:
- When installing or removing a transceiver module, avoid touching the golden plating on the transceiver module with a bare hand.
- Do not remove the dust plug from a transceiver module if you are not to connect an optical fiber to it.
- Remove the optical fibers, if any, from the transceiver module before installing it.
To avoid ESD damage, wear an ESD wrist strap when installing or removing an SFP transceiver module or network cable.
Make sure the wrist strap makes good skin contact and attach the wrist strap wire to the ESD jack (if any) on the device chassis as shown in the left part of Figure 1, or to the rack with an alligator clip as shown in the right part of Figure 1.
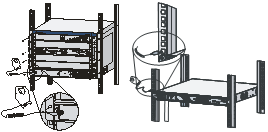
If you also use ESD gloves, wear the wrist strap outside an ESD glove and make sure it has good contact with the glove.
To install a transceiver module:
- Pivot the bail-clasp latch of the transceiver module up so that it catches a knob on the top of the transceiver module.
- Holding both sides of the transceiver module, gently push the transceiver module into the port until it makes firm contact with the port (you can feel that the top and bottom spring tabs catch in the socket). See Figure 2.
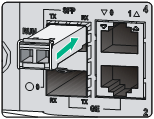
In case of limited space, you can gently push against the front face of the transceiver module instead of holding the sides. - Verify that the SFP modules are completely seated and secured in their assigned receptacles on the line card by firmly pushing on each SFP module. If the SFP module is not completely seated and secured in the receptacle, you will hear a click as the triangular pin on the bottom of the SFP module snaps into the hole in the receptacle.